In Kanzi you can use these render passes to set materials for rendering:
Draw Objects With Material Render Pass allows you to render nodes in a Scene node with a specific material. For example, use the Draw Objects With Material Render Pass to create different rendering modes. See Creating a night vision mode.
Material Setup Render Pass allows you to set properties for a material so that all successive rendering with that material uses the property values you set in this render pass. For example, use the Material Setup Render Pass to set the output of a Composition Target Render Pass as the texture of a material. See Creating an infinity mirror.
Creating a night vision mode
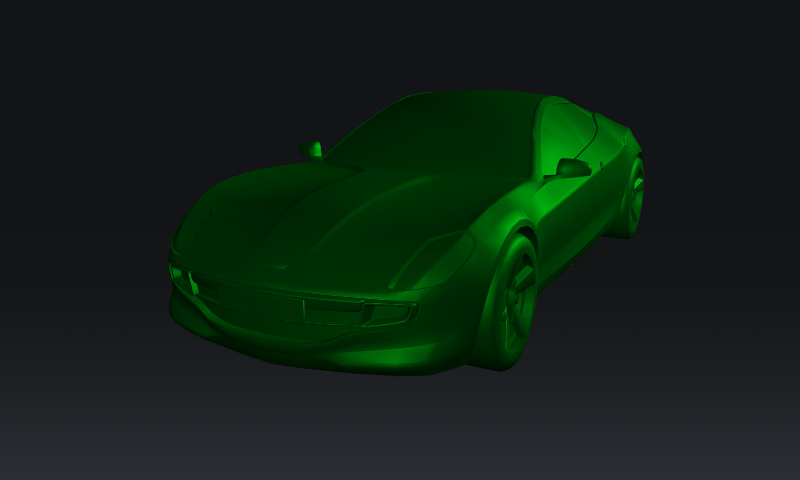
You can use the Draw Objects With Material Render Pass to render all nodes under a Scene node with a specific material. For example, you can create a night vision mode.
To create a night vision mode:
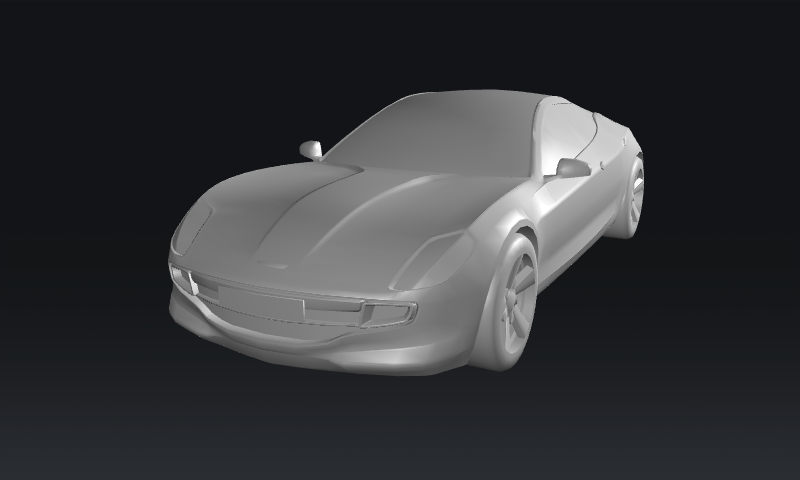
Create the content that you want to render in night vision mode. For example, use the Car from the Factory Content. See Using the Factory Content assets.
Create and apply the render passes that you need to render the content in night vision mode:
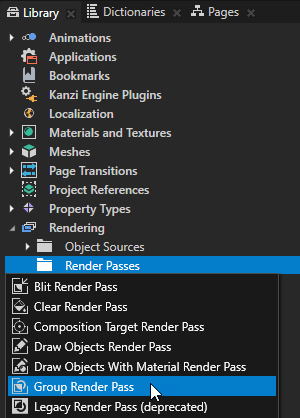
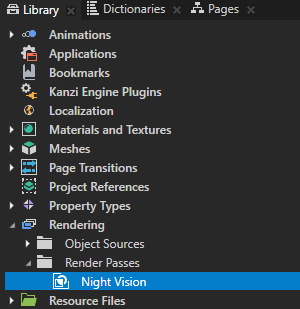
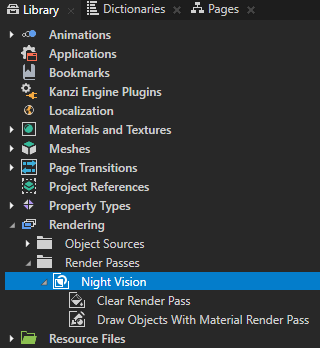
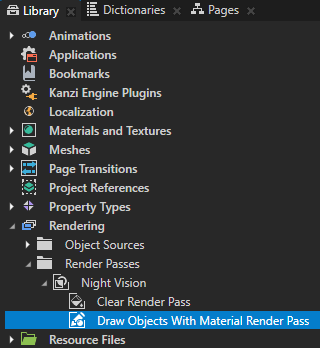
In the Library > Renderingpress Alt and right-clickRender Passes, select Group Render Pass, and name it Night Vision. You use this Group Render Pass to collect the render passes which apply the night vision mode to your content.
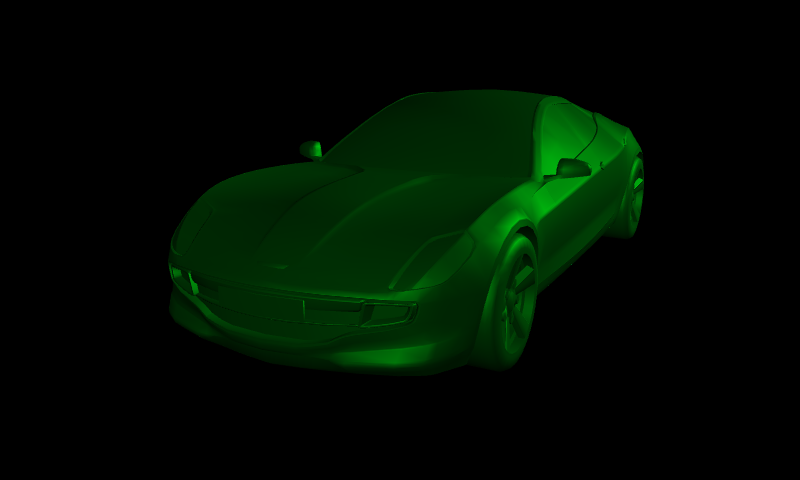
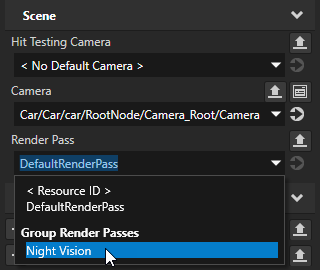
In the Project select the Scene node the content of which you want to render in night vision mode, and in the Properties set the Render Pass property to the Night Vision render pass. This way you set Kanzi to render the Scene node using the Night Vision render pass. The Night Vision render pass does not have any child render passes, which is why the Preview does not show any content.
In the Night Vision render pass create:
Clear Render Pass
Draw Objects With Material Render Pass
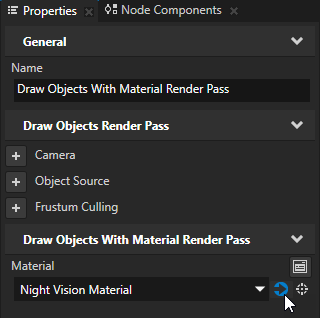
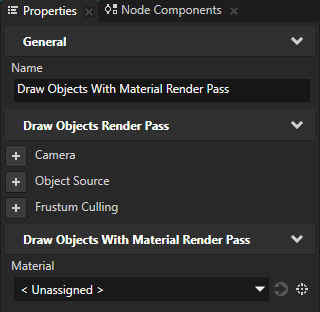
You can use a Draw Objects With Material Render Pass render pass to render all nodes under a Scene node with a specific material that you set in the Draw Objects With Material Render Pass. Because you have not yet set the Material property in the Draw Objects With Material Render Pass, Kanzi uses the default materials to render the content in the Scene node which uses the Night Vision render pass.
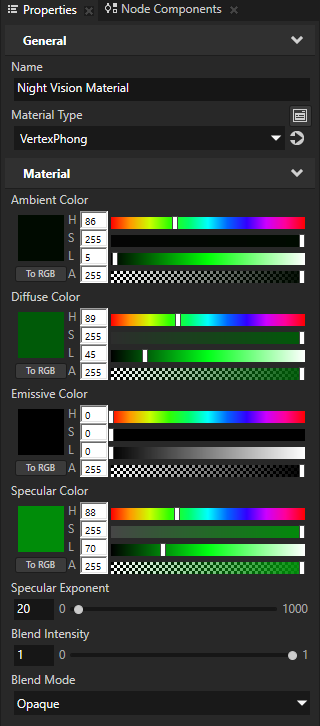
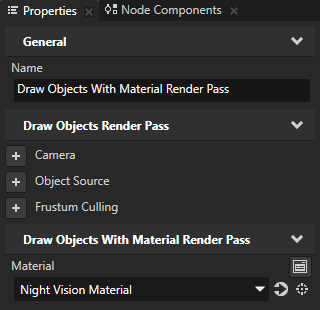
Create the material that you want to use for the night vision mode. For example, in the Library > Materials and Textures > Material Typespress Alt and right-clickVertexPhong, select Material, and name the material Night Vision Material. This way you create a material which uses the VertexPhong material type.
In the Library > Rendering > Render Passes select the Draw Objects With Material Render Pass and in the Properties set the Material property to the material you created in the previous step. Kanzi now renders all nodes in the Scene node, which uses the Night Vision render pass, with the material that you created.
In the
Properties click the next to the Material property to open the properties of the material that you created, and set the properties of the material to achieve the look you want.
In the Library > Rendering > Render Passes select the Clear Render Pass, in the Properties add the Clear Color property, and set the Lightness (L) property field to 0. This way you clear the color buffer with black color to make the background of your scene black in the night vision mode.
Control the switching between the day and night vision modes. For example, create a State Manager where you define states for:
Day mode, which sets in your Scene node the Render Pass property to the DefaultRenderPass render pass.
Night vision mode, which sets in your Scene node the Render Pass property to the Night Vision render pass.
Now when you switch between the states you created, Kanzi alternates between rendering your content normally and in night vision mode.
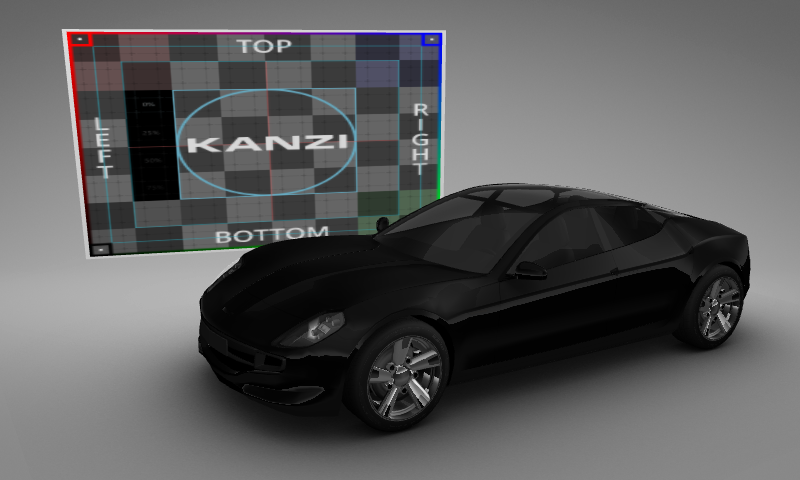
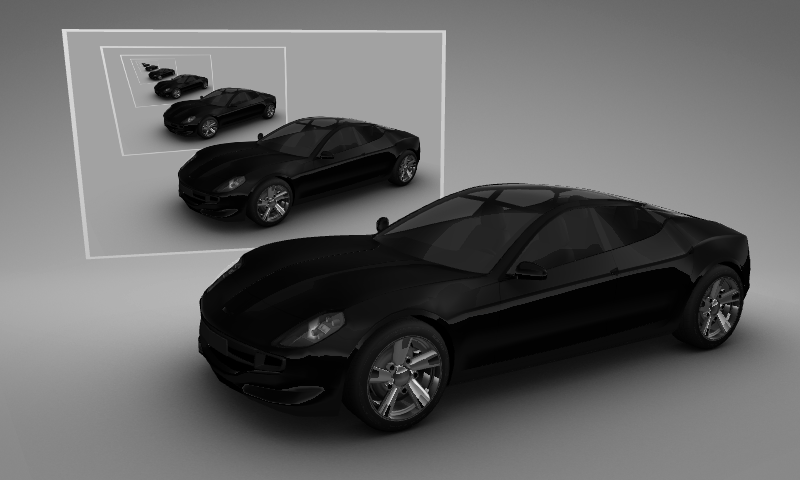
Creating an infinity mirror
Material Setup Render Pass allows you to set properties for a material so that all successive rendering with that material uses the property values you set in this render pass. For example, you can use the Material Setup Render Pass to create an infinity mirror effect.
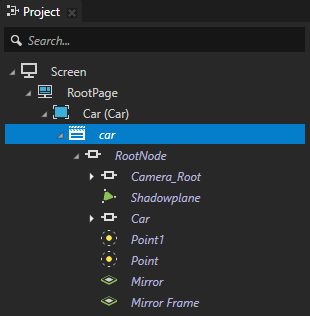
A node that you want to use as a mirror. For example, in the same Scene node as the content that you want to mirror, create a Plane node.
Create the material that you use to render the 3D content in the mirror:
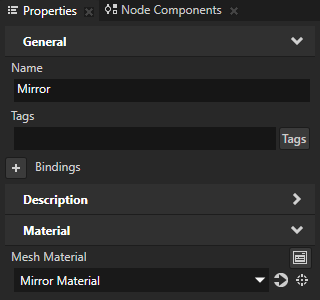
Create a textured material. For example, in the Library > Materials and Textures > Material Typespress Alt and right-clickTextured, select Material, and name the material Mirror Material.
In the Project select the node that you want to use as the mirror and in the Properties set the Mesh Material property to the material you created in the previous step.
Render the 3D content in the mirror:
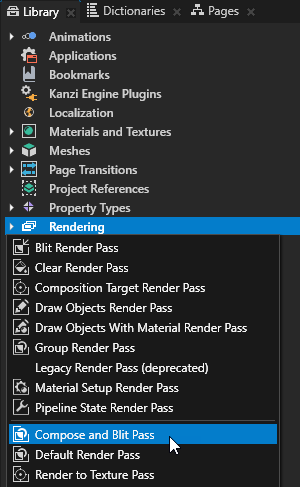
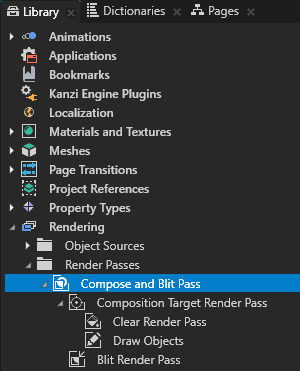
In the Librarypress Alt and right-clickRendering, and select Compose and Blit Pass. Compose and Blit Pass template contains the render pass structure that enables you to blit to the screen Composition Target Render Pass render passes or textures using a specific material. The template contains these render passes:
Composition Target Render Pass renders itself and its child render passes to a composition target.
Clear Render Pass clears some or all of the buffers of the current render context. By default the Clear Render Pass in the Compose and Blit Pass template clears the color buffer with transparent black color and the depth buffer with value 1. For example, to clear the color buffer with a different color, set the Clear Color property to the color that you want to use as the background color of the content that Kanzi renders to the Composition Target Render Pass.
Draw Objects Render Pass allows you to set a Camera node to render a specific object source and to control frustum culling. By default the Draw Objects Render Pass uses the default Camera node to render all nodes in a Scene node.
Blit Render Pass blits one or more render passes or textures on the screen using a specific material. By default this Blit Render Pass draws on the screen the content rendered by the Composition Target Render Pass.
In the Library select the Compose and Blit Pass > Composition Target Render Pass > Clear Render Pass and in the Properties set the Clear Color property to the color that you want to use as the background color of the scene in the mirror.
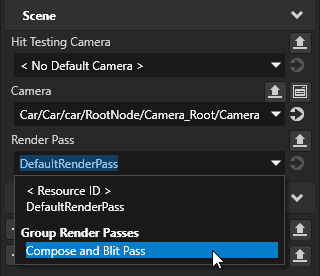
In the Project select the Scene node the content of which you want to render in the mirror, and in the Properties set the Render Pass property to the Compose and Blit Pass. This way you set Kanzi to render the Scene node using the Compose and Blit Pass.
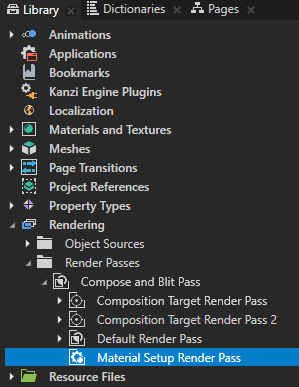
In the Library in the Compose and Blit Pass create a second Composition Target Render Pass and drag the Blit Render Pass to that Composition Target Render Pass. You use the second Composition Target Render Pass to render the first Composition Target Render Pass to a composition target. You create two Composition Target Render Pass render passes because the rendering behavior is undefined if you simultaneously write to and read from the same render pass.
In the Compose and Blit Pass create a Default Render Pass. Default Render Pass creates a basic set of render passes that first render opaque nodes and then transparent nodes. You use this render pass to render to the screen the content of the Scene node.
In the Compose and Blit Pass create a Material Setup Render Pass and in the Properties add and set:
Material to the material that you created earlier in this procedure. For example, set it to Mirror Material.
Texture to the second Composition Target Render Pass that you created. For example, set it to Composition Target Render Pass 2. Here you set the value of the Texture property for the material that you created, so that Kanzi uses the value when rendering content using the Compose and Blit Pass.
This way you set Kanzi to render the Composition Target Render Pass 2 in the node that uses the Mirror Material.
Kanzi now recursively renders the contents of the scene in the mirror.


 next to the